

How To Export Rendered Animation In Blender

Creating your own animations in Blender is a rewarding process where you can create your ain world and story and and then promote it to the world with pride for what yous were able to create. But even subsequently finishing your animation, yous however need to render information technology and relieve the video as an external file.
To export your rendered animation from Blender, you volition want to consummate the checklist below.
- Set The Right Frame Rate
- Define The Resolution Of The Blitheness
- Prepare Your Scene Camera
- Choose The Location For Your Render
- Prepare The Start And End Frames Of The Animation
- Select The Render Blitheness Option
- After Rendering Brand Sure To Preview The Created File To Ensure All Is Correct
It is a relatively simple checklist but each step is important for completing the animation process. Most important volition be to ensure that your animation goes to the location that yous want it to so that you tin locate the file afterwards rendering.
How To Consign A Video From Blender?
Rendering your 3D animation from Blender is simple enough to do in one case you know all the little steps needed to return the blitheness correctly. Past correctly nosotros mean having the right frame rate and resolution for the blitheness.
Of class, the steps required to correctly return the video are not all done before the actual return, but at various stages in the project. So let'south run through each footstep and when it needs to exist completed.
Before you brainstorm actually creating the models for your animation and begin the process of rigging and creating your keyframes, you should make up one's mind the frame rate of the target video output every bit 1 of the first things you can practice.
We need to do this early on considering the frame rate will directly impact how the keyframes of your animation will work. For example, create a keyframe of a billowy ball that takes a second to bounciness at 30fps, so change the frame rate to 60fps.
Even though the frame charge per unit has changed the length of the bouncing brawl blitheness is notwithstanding just 30 frames, which ways that the ball volition now autumn twice as fast, changing the final result.
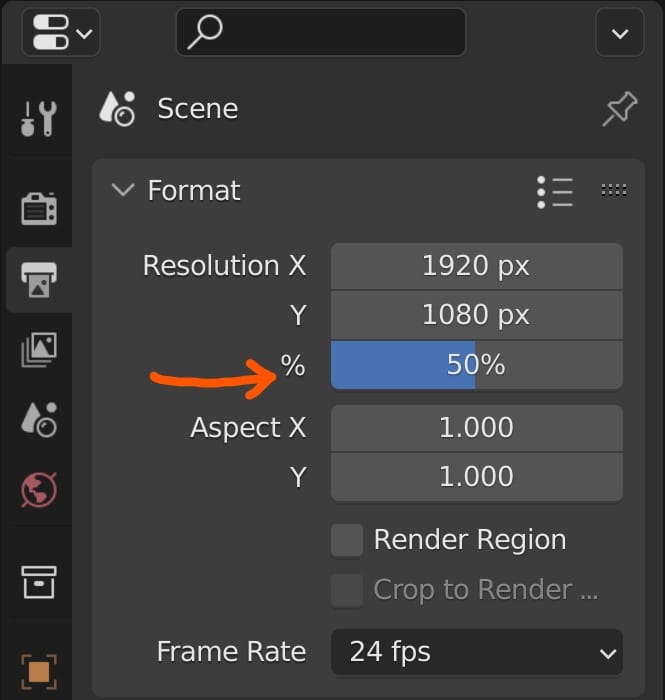
To change your frame rate, along with completing the various other steps in the consign procedure, go to the render tab in the properties panel, and the frame charge per unit will be child-bearing towards the top of the panel as seen in this image.

In a higher place the frame rate option in the same tab, you tin ascertain the resolution of the animation that will be rendered. While you practice not need to change this straight away you may cull to anyway.
Nosotros recommend as an additional tip to set the resolution of the blitheness to be half of what your final output is going to be on the X and Y axis. This will dramatically reduce the return time for each frame. Nosotros recommend this because y'all volition want to test render your blitheness before rendering the last result, and so a lower resolution will create a quick result that acts equally a good representation of the final product.
During your project, you will need to brand sure that your cameras are set up correctly in the 3D viewport. This is where examination rendering at a lower resolution becomes valuables you tin can set up your camera in different positions and test return your scene from different angles.

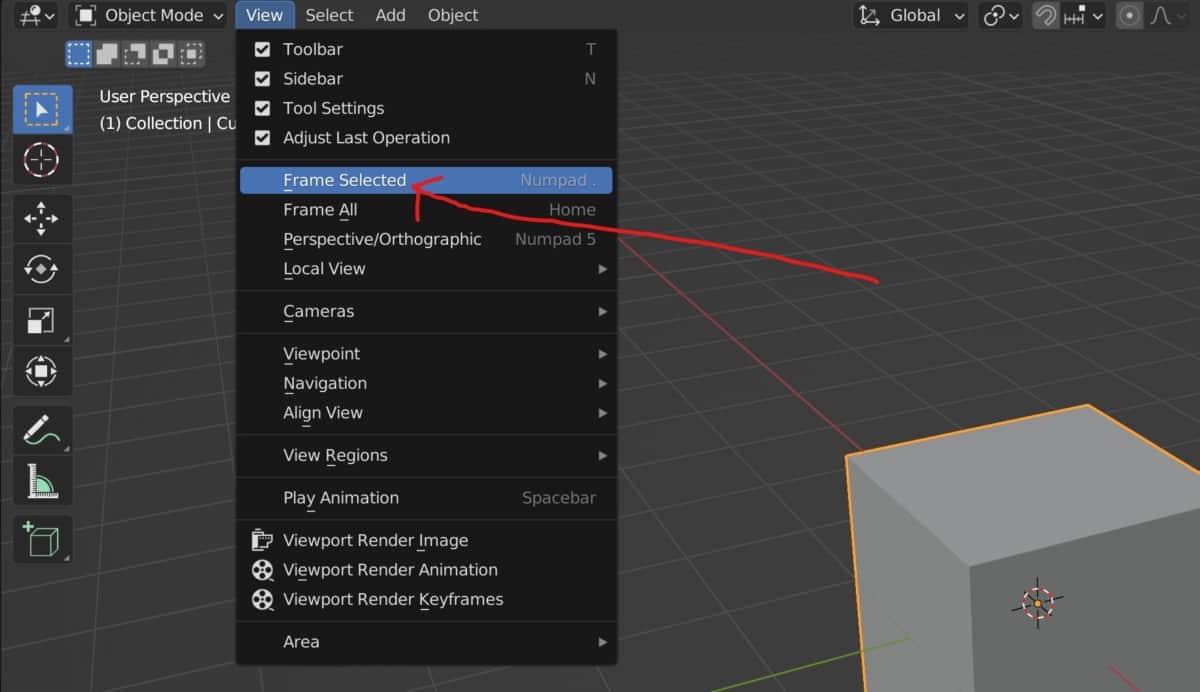
Yous can likewise adjust the number of frames for your animation at this point, which can be changed either from the backdrop panel or from the timeline, as seen directly beneath.
Another tip is to only exam return a part of your animation, to further speed things upward. If you have a x-second blitheness running at 30fps, then you can fix the test render to simply the offset ii seconds past setting the terminate frame to 60.

Combined with the lowering of the resolution, your test renders tin can be produced quickly preventing you from having to wait too long before standing the projection.
By the time you finish the animation itself, you will nigh be ready to render and export it. The next step, which can also exist completed before on in the process, is the defined location of your video file.
Past default, animations renders are saved to the temp file on your figurer, which is otherwise difficult to access and has the flaw of being, you guessed it, temporary. This means that any video stored there is deleted periodically.
It is a much ameliorate practice to select a new location to relieve your render. While you can practise this earlier, nosotros recommend waiting until after you take test rendered the animation, and so that the exam renders go to the temp file commencement.
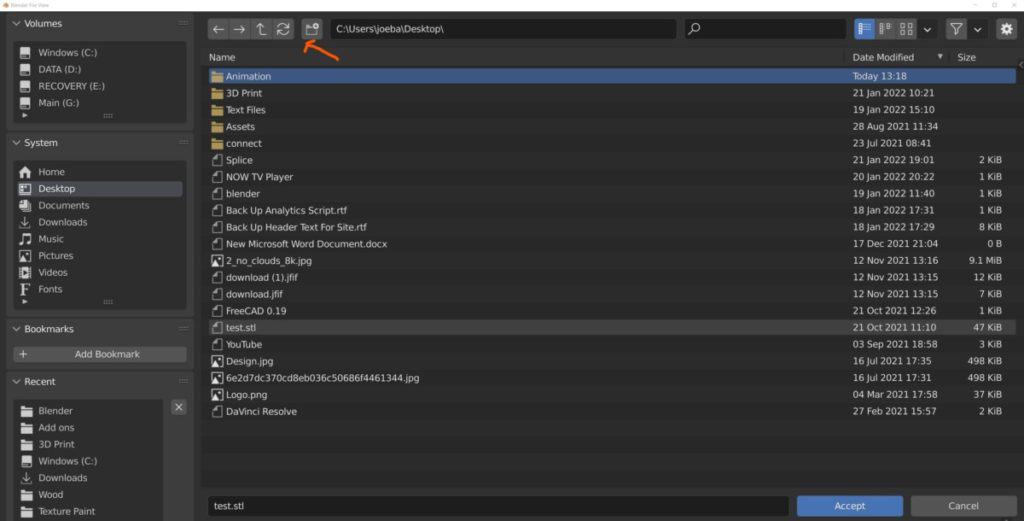
You can change the target file by going to the Properties Panel > Return Tab > Select The Open Push button, which opens the file browser.

Instead of selecting an existing binder to save your render to, yous should instead create a new folder in an easy to attain location exclusive for the animation. This will be particularly useful if y'all choose the condom method of rendering animations, which we volition cover later on on. Keep your new folder empty and aside from your render.
Below the option to choose your target location y'all will besides exist able to cull the file format that will be created on consign. There is a reason why it is actually a proficient thought to set this to a png format merely if you want to export information technology directly to a moving picture file select where information technology says PNG and so choose 1 of the video formats from the menu, such every bit FFmpeg.
At this signal, you are ready to start the rendering process, so go to the return card in the header bar of the Blender interface and select return animation. Make sure that everything else is set before yous select the render push.

Once you accept rendered the animation, locate the video file on your desktop browser and select the video file to open it using your ain video player, you don't demand to use Blender for this step.

What Is The All-time Video Output Choice In Blender?
With Blender, you are able to choose which video format that you wish to consign your animation as, and each format stores your information in a slightly different way.
What is important is the ability to play your blitheness without outcome, which the majority of file formats bachelor to you let.
Which format you choose is not going to exist the most important determination yous make today, and so our advice is normally to go with what you lot know.
To change your file format for the video output, go to the output tab where you are able to control the target location of the blitheness.
Below you volition be able to change your file format, which should be a moving-picture show format by default. Clicking here opens upwards a menu of all the picture and video formats that you tin can utilise without boosted addons.

Our recommendation is to go with FFmpeg as the file format for your movies, just AVI Raw will exercise the job every bit well.
All is not complete, however, every bit you and then need to choose the right settings for your file format. There volition exist a airtight subsection labeled Encoding simply beneath, open this upwardly to access the format settings.

Here, yous will want to choose the container that you desire to use to shop the video file. Again this does not have much of an impact on the playability of the animation equally virtually containers are widely recognized and used.
The Matroska container is a flexible pick that holds a lot of information, while QuickTime and AVI containers a great for saving on storage infinite.
MPEG-4 all the same is the platonic choice for first-class terminal quality and is recognized past almost any application and media player. It is our choice when we create animations in Blender.
Yous then demand to choose the video options that you desire to utilise. You tin keep these as they are simply the settings that we use are h.264 for the video codec, High Quality for the output quality, and a practiced encoding speed. Changing these options affects the trade-off between speed of encoding and quality of the terminal result.
For production-level projects, utilise a lossless quality with a tiresome encoding speed to maximize the last quality, although the result is a marginal comeback to the video as a whole.
Rendering An Edited Video In The Video Sequence Editor
Blender is habitation to so many tools and functions that you may exist forgiven for not knowing one of its well-nigh surprising secrets, that it has a full video editing suite. Not only are y'all able to render 3D animations later creating them in the 3D viewport, but you are as well able to edit those renders in the video sequence editor.
The Video Sequence Editor, or VSE for short, allows yous to import either movie files or image sequences into its timeline, assuasive you to begin editing that file as you would in another video editing software like DaVinci Resolve.
Admittedly, this is one of the least progressive areas of the Blender software, and in terms of both performance and functionality, it falls well behind the more traditional video editing applications that y'all may be using.
When you import a video into the VSE, one affair that Blender does not tell yous is that video at present has rendering priority over what you take in the viewport.

So when you go to press that render animation button, it volition begin encoding and exporting the file editing in the VSE and non what you have prepare in the viewport. This is one of the reasons why video editing has a separate template to 3D modeling in the Blender interface.
The options that you use in the properties panel to set up your animation renders work the same way for videos in the VSE, so make sure that these options are prepare accordingly to what you want from your video file, including the output file and target resolution.
Because we are effectively encoding rather than rendering, the process is much faster than rendering an animation from the viewport as the data is already in that location in the edited video. Typically a 5-minute edited video may have ane-2 minutes to encode depending on the settings used for example.
Other than the fact that you are rendering from the VSE there is very little modify to the rendering process and so but adjust the steps listed at the top of this commodity to your video edits instead.
Saving Your Video File In An Appropriate Location
I of the more important troubleshooting steps that you tin take is to set an advisable output location for your rendered animation.
By default, the animation will exist sent to the temp file on your estimator if you are using a windows device, and to a similar location if using whatever other operating system.
This means that if you render your animation so shut downwardly your computer, you gamble losing the animation that y'all rendered.
In Blender, temp files are best suited to caching data like physics simulations and baking elements of a scene, but it is non where you lot should exist saving your renders if you want to keep them.
You do non want to modify your target output direct abroad though as information technology tin can be useful to have the temp file for your examination renders.
A test render is a pocket-sized section of the project that you cull to render at a lower resolution to analyze the quality of the animation, object positioning, photographic camera placement, etc.
For the final return, however, you volition want to choose a destination that is easy to access, and a scrap more permanent.
In the output tab of the Properties console, select the output co-operative to open if not already, and and then select the binder icon to bring upwardly the file browser.
Select the desktop as your initial target location, so you can admission the file quickly after the render is finished.
You will also desire to create a binder to store your animation in, and then select the binder icon at the top of the file browser and and then name the new folder to something appropriate.
Open upwardly the binder and so press the blueish Accept button to confirm that equally the target location for your render.
The All-time Method For Rendering Animations In Blender
If y'all follow the steps higher up you should be able to successfully render your blitheness and export it to your target location and file format, but there is a gamble to doing it the traditional manner.
Rendering a whole animation takes time, and a lot of time at that. If a unmarried frame takes x seconds to render, then how long would a 300 frame render take to cease? Well information technology would take around fifty minutes in total, and if your using cycles every bit your render engine, it could take much more than that to finish rendering.
The risk here is when your car crashes during the rendering procedure. Imagine beingness 30 minutes into the render and then Blender all of a sudden and abruptly closes. All that time spent rendering has been wasted, as the file has non had a chance to be exported.
While this is certainly frustrating, at that place is a much safe method that only takes a little bit of extra time, and that is to return your animation as an image sequence.
A movie file is a single file for playing video content, while an image sequence is a group of numbered frames that can be played sequentially to view the video.
Each frame is saved as its own image and y'all tin access these individual frames from the target location, perchance using a frame and editing it to be the thumbnail of a Youtube video for instance (Make sure to save the edit to a different location!).
Only where this is really useful is equally a countermeasure to crashing. If Blender fails 100 frames into rendering a flick file, then the unabridged return has failed and you will demand to outset over.
If rendering as an image sequence then the first 100 frames will be saved as 100 images, allowing you lot to reopen Blender, fix the start frame to 101, and restart the rendering procedure from in that location, without needing to render the offset 100 frames again.
Is Rendering Equally A JPEG Better Than Equally An MP4?
So is it improve to render equally an paradigm format similar a jpeg or a PNG instead of a video format similar MP4? For the initial render the answer is yes, only information technology is much easier to bargain with a single motion picture file than information technology is an prototype sequence of 300 frames.
The solution is to initially render your animation every bit an prototype sequence and so import that image sequence into your VSE. Even if you chose not to actually edit the content, yous can import the image sequence and so immediately export information technology as a film file.
To practise this beginning open up upwardly your Video editing workspace in the Blender project by pressing the plus push button in the workspace tabs and selecting the option for video editing.

And then get to the add together menu in the video sequence editor and select prototype sequence. This will open upwardly the file browser from where you volition need to locate where you saved your rendered frames.
The frames will appear in numerical order. Printing the A key to select every item in your binder, and if you have created a folder exclusively for the render, y'all won't have to worry about other files beingness selected accidentally.
Select Add Prototype Strip to import your image sequence into your video editor, and make sure it is positioned at frame 1.

Then return to the Output tab in the backdrop console and set the output format to a picture show file such as the MP4 format. You practice not need to change the output location if you don't want to.
And so select the return blitheness option again, only this time Blender file encode your image sequence and convert information technology into a video file, which will be visible in the target location.
Thank you For Reading The Article
We appreciate you taking the fourth dimension to read the article. We promise that you were able to detect the data that you were searching for. Below nosotros have compiled a list of additional topics that you may be interested in reading.
- Installing Blender On Your Device For The Get-go Time
- What Are The Shortcuts For 3D Blitheness?
- Creating An Overlay For Videos In Blender
- Adding An Epitome Sequence Equally A Plane Object
- Calculation Text Elements To Videos In The Video Sequence Editor

-
How To Control The Positioning Attribute When Working With Objects In Geometry Nodes?
Over time y'all will brainstorm to employ the geometry nodes arrangement in new ways as you explore the multiple layers of complexity to the node arrangement. 1 of the fundamental
Continue Reading
-
How To Change Your Geometry Shape Using Editing Tools Through Geometry Nodes?
When the concept of geometry nodes was start introduced the thought was to exist able to create objects procedurally that could be edited at any indicate in the process. Fast
Go on Reading
-
Getting The Cursor Back To The Earth Origin And Other Cursor Tips
If you are not used to working in 3D infinite, then there are a lot of things that you volition need to work on to become habits. One matter that
Continue Reading
Source: https://blenderbasecamp.com/home/exporting-your-videos-from-blender/
Posted by: livingstoneful1977.blogspot.com
0 Response to "How To Export Rendered Animation In Blender"
Post a Comment